Updating the Android system firmware is an important process to ensure your device runs smoothly, securely, and with the latest features. Here’s a step-by-step guide on how to update the Android system firmware, please bear in mind that please contact Shiningintl to get the firmware package before this operation:
1, install the DriverAssitant_v5.1.1 at first in the computer(if this installation has been done before, just ahead)

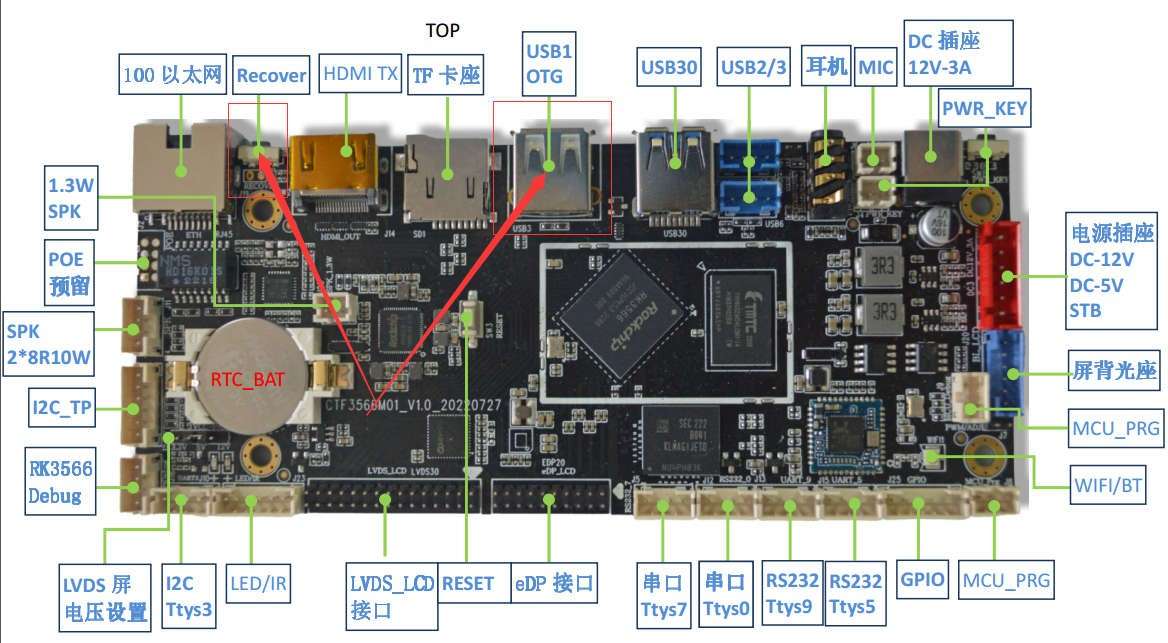
2,connect the android board and the computer with usb cable, please bear in mind that must connect the OTG port in the motherboard as shown below, the USB OTG port in red arrow.

3,Press the RECORDY-KEY button on the motherboard (as indicated by the arrow in the figure above), then power the motherboard by inserting the power supply into the board . When the computer finds the USB device (there will be sound prompt when the windows found the motherboard) release the RECORDY-KEY button at this time. If it is inconvenient to operate, please follow step 4
4,if it is not convenient to operate the step 3, then there is another way update the system(in this way, the android motherboard is on working status.)
- 4.1power on the motherboard and enter the android system as nor
- 4.2prepare a USB disk, create a text file named “otg.cfg”in the root fold , and then plug the U disk into any usb port of the motherboard, except the OTG port
- 4.3connect the computer and motherboard OTG port with USB cable.
- 4.4extract the reboot_loader.7z, and run the bat inside it.
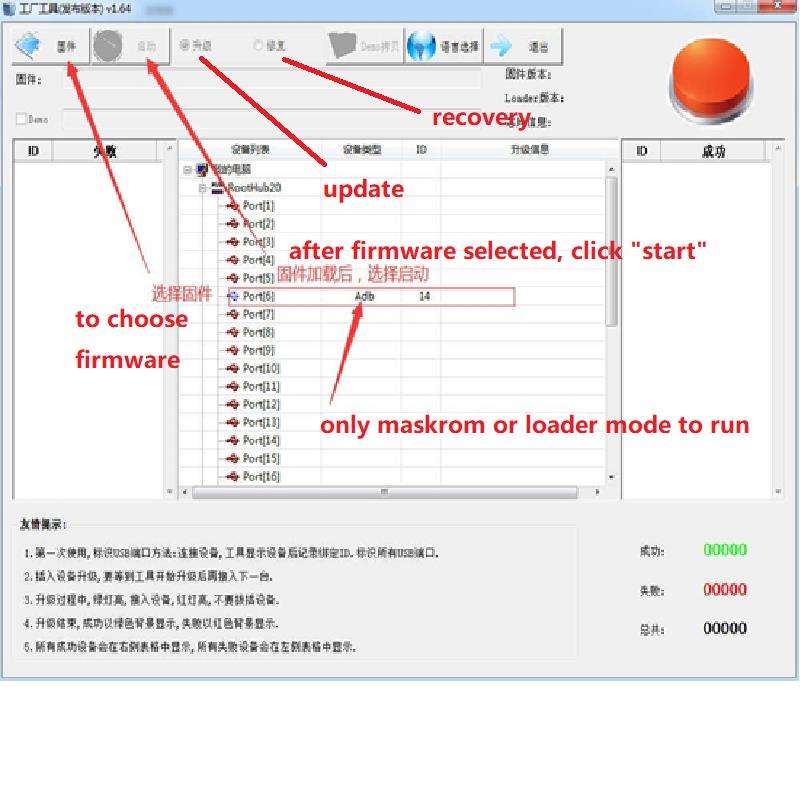
5,open the update tools “FactoryTool.exe” choose the img file打as below , and then check the “recovery”, and then click the “start”to launch the operation
FactoryTool-1.72.7 /FactoryTool.exe

When the update succeed, the system will restart automatically.
